How to install NGINX MariaDB and multiple PHP versions in macOS
How to install NGINX, MariaDB and multiple PHP versions in macOS
A brief introduction about the application softwares discussed in this article
- NGINX – A high-performance web server, load balancer, reverse proxy etc. with a very low memory footprint.
- PHP – Server-side software which handles the data processing. We use the PHP-FPM (FastCGI Process Manager) implementation.
- MariaDB – A community developed fork of the famous MySQL relational database. It will act as our backend datastore.
At the time of writing this article, the available versions are listed below
- macOS version 10.12.6 (Sierra)
- NGINX version 1.15.5
- PHP version 5.6 and 7.2
- MariaDB version 10.3.10
We are considering that the machine does not have any software installed on the default HTTP port 80. Super user access (sudo) and brew package manager is required to complete the installation.
You can learn to setup brew package manager from the article How to install a package manager for macOS. Let us assume that your terminal shell is BASH.
NGINX
NGINX installation is the easiest. Open the terminal software and execute the following command
$ brew install nginx
Once the installation is complete, the next job would be to configure auto-start for NGINX. As we would be running the application in the default HTTP port 80, we would require root privileges (Privileged ports < 1024 can be opened only by root). Execute the following command in the terminal
$ sudo cp -v /usr/local/opt/nginx/homebrew.mxcl.nginx.plist /Library/LaunchDaemons/
$ sudo chown root:wheel /Library/LaunchDaemons/homebrew.mxcl.nginx.plist
The next step would be to change the default port of NGINX from 8080 to 80. Edit the NGINX configuration using your favourite editor. I will be using VIM. If you are a novice, I suggest that you create a backup of the configuration file. This will help rule out chances of file corruption.
$ cp /usr/local/etc/nginx/nginx.conf /tmp/nginx.conf.bak
$ vim /usr/local/etc/nginx/nginx.conf
Search the following line inside the server directive (curly braces)
listen 8080;
Change it to
listen 80;
Start the NGINX server
$ sudo launchctl load /Library/LaunchDaemons/homebrew.mxcl.nginx.plist
You can verify the working of NGINX by executing the following command (assuming that curl is installed)
$ curl -IL http://127.0.0.1:80
HTTP/1.1 200 OK
Server: nginx/1.15.5
Date: Wed, 24 Oct 2018 14:01:29 GMT
Content-Type: text/html
Content-Length: 612
Last-Modified: Tue, 02 Oct 2018 15:13:59 GMT
Connection: keep-alive
ETag: "5bb38b37-264"
Accept-Ranges: bytes
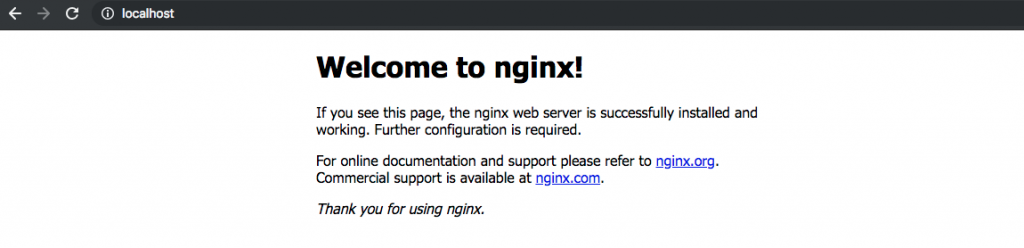
This can also be verified by using the browser, enter http://localhost on the address bar, you will be greeted with the following image
PHP
At the time of writing this article, LiteBreeze, a 14-year-old bespoke web application development company maintains multiple legacy applications. Hence PHP 5.6 is a requirement for development. However, new projects are all developed in Laravel using the latest PHP 7.2.
Let’s install PHP 5.6. Execute the following command in the terminal
$ brew install --without-apache --with-fpm --with-mysql --with-curl --with-xml \
--with-mbstring --with-bcmath --with-zip --with-gd --with-soap php56
To install PHP 7.2, execute
$ brew install php72 Once installation of both the PHP versions are completed, we will run them in PORTS rather than FILE SOCKETS. Fire up your favourite editor and open the following files.I have used VIM
$ vim /usr/local/etc/php/7.2/php-fpm.d/www.confSearch and replace the following line
listen = 127.0.0.1:9000to
listen = 127.0.0.1:9072I have set the port to 9072 – so that the last two digits indicate the PHP version running on it. Similarly for PHP 5.6 version, we will set the port to 9056 (56 denoting 5.6 version)
$ vim /usr/local/etc/php/5.6/php-fpm.confSearch and replace the following line
listen = 127.0.0.1:9000 to
listen = 127.0.0.1:9056Configure the PHP CLI binary
$ echo 'export PATH="/usr/local/sbin:$PATH"' >> ~/.bash_profile && . ~/.bash_profileNext step is to configure auto-start on system boot. Create the following directory
$ mkdir -p ~/Library/LaunchAgents
Create soft links for configuration files
$ ln -sfv /usr/local/opt/php\@5.6/homebrew.mxcl.php\@5.6.plist ~/Library/LaunchAgents/
$ ln -sfv /usr/local/opt/php\@7.2/homebrew.mxcl.php.plist ~/Library/LaunchAgents/
Start PHP-FPM services
$ launchctl load -w ~/Library/LaunchAgents/homebrew.mxcl.php\@5.6.plist
$ launchctl load -w ~/Library/LaunchAgents/homebrew.mxcl.php.plist
Before proceeding further, let’s ensure that PHP-FPM is running. We can verify by checking for open listeners on ports 9056 & 9072:
$ lsof -Pni4 | grep LISTEN | grep phpThe output should look something like this(ports 9056 & 9072 are being listed):
php-fpm    8955 litebreeze    7u IPv4 0xf78171cd083fc4eb      0t0 TCP 127.0.0.1:9056 (LISTEN)
php-fpm    8956 litebreeze    0u IPv4 0xf78171cd083fc4eb      0t0 TCP 127.0.0.1:9056 (LISTEN)
php-fpm    8957 litebreeze    0u IPv4 0xf78171cd083fc4eb      0t0 TCP 127.0.0.1:9056 (LISTEN)
php-fpm   17269 litebreeze    8u IPv4 0xf78171cd1256dbf3      0t0 TCP 127.0.0.1:9072 (LISTEN)
php-fpm   17270 litebreeze    9u IPv4 0xf78171cd1256dbf3      0t0 TCP 127.0.0.1:9072 (LISTEN)
php-fpm   17271 litebreeze    9u IPv4 0xf78171cd1256dbf3      0t0 TCP 127.0.0.1:9072 (LISTEN)
Let us configure two virtual host files to mock projects of PHP versions 5.6 and 7.2 respectively
$ cd /usr/local/var/www/
$ mkdir php56
$ cd php56
Create an index.php file
$ vim index.phpInsert the following content
<?php
phpinfo();
Create another directory php72 for PHP 7.2 version project and copy the index.php file
$ cd ..
$ mkdir php72
$ cp php56/index.php php72
Next step is to create two virtual hosts for the two PHP projects
$ cd /usr/local/etc/nginx/serversUse your favourite editor, create a file php56.conf for PHP 5.6 version project
$ vim php56.confInsert the following contents
server {
        listen 80;
        listen [::]:80;
        root /usr/local/var/www/php56;

        # Add index.php to the list if you are using PHP
        index index.php index.html index.htm index.nginx-debian.html;

        server_name php56.test;

        location / {
                # First attempt to serve request as file, then
                # as directory, then fall back to displaying a 404.
                try_files $uri $uri/ /index.php?$query_string;
        }

        # pass the PHP scripts to FastCGI server listening on
        #
        location ~ \.php$ {
                fastcgi_pass 127.0.0.1:9056;
                fastcgi_split_path_info ^(.+\.php)(/.+)$;
                fastcgi_param SCRIPT_FILENAME $document_root$fastcgi_script_name;
                include fastcgi_params;
        }
}
Create a file php72.conf for PHP 7.2 version project
$ vim php72.confAdd the following contents, notice the difference in root directory (/usr/local/var/www/php72), server name (php72.test) and PHP port (9072)
server {
        listen 80;
        listen [::]:80;
        root /usr/local/var/www/php72;

        # Add index.php to the list if you are using PHP
        index index.php index.html index.htm index.nginx-debian.html;

        server_name php72.test;

        location / {
                # First attempt to serve request as file, then
                # as directory, then fall back to displaying a 404.
                try_files $uri $uri/ /index.php?$query_string;
        }

        # pass the PHP scripts to FastCGI server listening on
        #
        location ~ \.php$ {
                fastcgi_pass 127.0.0.1:9072;
                fastcgi_split_path_info ^(.+\.php)(/.+)$;
                fastcgi_param SCRIPT_FILENAME $document_root$fastcgi_script_name;
                include fastcgi_params;
        }
}
Edit the /etc/hosts file to add the virtual hosts
$ sudo vim /etc/hostsChange the line
127.0.0.1 localhostto
127.0.0.1 localhost php56.test php72.testThe end result would be
##
# Host Database
#
# localhost is used to configure the loopback interface
# when the system is booting.  Do not change this entry.
##
127.0.0.1       localhost php56.test php72.test
255.255.255.255 broadcasthost
::1             localhost
Restart NGINX
$ sudo launchctl unload /Library/LaunchDaemons/homebrew.mxcl.nginx.plist
$ sudo launchctl load /Library/LaunchDaemons/homebrew.mxcl.nginx.plist
Fire up your browser, enter the following in the address bar


MariaDB
To install MariaDB, execute
$ brew install mariadbAfter the installation is complete, configure the start/stop service, so the MySQL server gets automatically stopped and started when the Mac is shutdown/powered-up respectively:
$ ln -sfv /usr/local/opt/mariadb\@10.3/homebrew.mxcl.mariadb.plist ~/Library/LaunchAgentsTo launch the service before reboot, execute
$ launchctl load ~/Library/LaunchAgents/homebrew.mxcl.mariadb.plistVerify the working using the following command.
$ sudo lsof -PiTCP -sTCP:LISTEN | grep mysqldThe output would be similar to this
mysqld 9574 litebreeze 22u IPv6 0xf78171cd085b6d7b 0t0 TCP *:3306 (LISTEN)To secure the MariaDB installation, follow the instructions after executing the command
$ mysql_secure_installationTest the connection
$ mysql -u root -p
Enter password:
Welcome to the MariaDB monitor.  Commands end with ; or \g.
Your MariaDB connection id is 14
Server version: 10.3.10-MariaDB Homebrew
Copyright (c) 2000, 2018, Oracle, MariaDB Corporation Ab and others.
Type 'help;' or '\h' for help. Type '\c' to clear the current input statement.

MariaDB [(none)]> exit
Bye
Shortcuts
Starting and stopping services in OSX is a tedious process. Switching between PHP CLI binary is another uphill task. Hence, to make the development easier, add the following content to your ~/.bash_profile file. Please note that the following section assumes that PHP versions 7.2 and 5.6 are the only installed versions.
alias php-fpm72.start="launchctl load -w ~/Library/LaunchAgents/homebrew.mxcl.php.plist"
alias php-fpm72.stop="launchctl unload -w ~/Library/LaunchAgents/homebrew.mxcl.php.plist"
alias php-fpm72.restart='php-fpm.stop && php-fpm.start'
alias php-fpm56.start="launchctl load -w ~/Library/LaunchAgents/homebrew.mxcl.php@5.6.plist"
alias php-fpm56.stop="launchctl unload -w ~/Library/LaunchAgents/homebrew.mxcl.php@5.6.plist"
alias php-fpm56.restart='php-fpm56.stop && php-fpm56.start'
alias nginx.error_logs='tail -100f /usr/local/var/log/nginx/error.log'
alias nginx.access_logs='tail -100f /usr/local/var/log/nginx/access.log'
alias nginx.start='sudo launchctl load /Library/LaunchDaemons/homebrew.mxcl.nginx.plist'
alias nginx.stop='sudo launchctl unload /Library/LaunchDaemons/homebrew.mxcl.nginx.plist'
alias nginx.restart='nginx.stop && nginx.start'
alias mariadb.stop='sudo /usr/local/Cellar/mariadb/10.3.10/bin/mysql.server stop'
alias mariadb.start='sudo /usr/local/Cellar/mariadb/10.3.10/bin/mysql.server start'
alias mariadb.restart='sudo /usr/local/Cellar/mariadb/10.3.10/bin/mysql.server restart'

alias php56='brew unlink php72 && brew link php56 --force'
alias php72='brew unlink php56 && brew link php72 --force'
Reinvoke the SHELL using the updated file
$ source .bash_profile
$ php -v
PHP 7.2.11 (cli) (built: Oct 11 2018 16:23:06) ( NTS )
Copyright (c) 1997-2018 The PHP Group
Zend Engine v3.2.0, Copyright (c) 1998-2018 Zend Technologies
    with Zend OPcache v7.2.11, Copyright (c) 1999-2018, by Zend Technologies
As you can figure out from the output, PHP 7.2 is the current CLI version. Let’s change it to 5.6
$ php56
Unlinking /usr/local/Cellar/php/7.2.11... 24 symlinks removed
Linking /usr/local/Cellar/php@5.6/5.6.38... 25 symlinks created
$ php -v
PHP 5.6.38 (cli) (built: Sep 14 2018 22:32:34)
Copyright (c) 1997-2016 The PHP Group
Zend Engine v2.6.0, Copyright (c) 1998-2016 Zend Technologies
    with Zend OPcache v7.0.6-dev, Copyright (c) 1999-2016, by Zend Technologies
Let us switch again back to 7.2
$ php72
Unlinking /usr/local/Cellar/php@5.6/5.6.38... 25 symlinks removed
Linking /usr/local/Cellar/php/7.2.11... 24 symlinks created
$ php -v
PHP 7.2.11 (cli) (built: Oct 11 2018 16:23:06) ( NTS )
Copyright (c) 1997-2018 The PHP Group
Zend Engine v3.2.0, Copyright (c) 1998-2018 Zend Technologies
    with Zend OPcache v7.2.11, Copyright (c) 1999-2018, by Zend Technologies
From the above examples, switching PHP CLI versions is a cinch with custom commands php56 and php72. I have listed the explanations for the following commands which were added to ~/.bash_profile file
nginx.restart - Restart the NGINX server
nginx.error_logs - Display the NGINX error log in the terminal
nginx.access_logs - Display the NGINX access log in the terminal
php-fpm72.restart - Restart the PHP 7.2 version FPM
php-fpm56.restart - Restart the PHP 5.6 version FPM
mariadb.restart - Restart the MariaDB server
As you can see, using the above approach enables us to set up our Mac to simultaneously run different projects, each using a different version of PHP. At LiteBreeze, we always strive to improve and share our technical knowledge.
We hope this article help improve your web application development experience with macOS, especially when dealing with legacy applications.